Homemade apple cider vinegar is a natural product that was once a staple in every household. It was made from apples that were not beautiful enough to eat, but were still healthy and usable. This vinegar was not just a seasoning, but also a remedy, a preservative, and the foundation of a healthy diet. Unlike industrial apple cider vinegar, homemade vinegar does not contain additives, fermentation accelerators, or artificial acids. It is created through a slow, natural fermentation process and retains all the benefits of that process.
Which Apples Are Best for Vinegar
For homemade apple cider vinegar, you can use:
-
old apples
-
apples that are not suitable for eating
-
apples damaged by long storage
Important notes:
-
all rotten parts must be removed
-
apples must be healthy on the inside
-
sweetness and size are not important
Ingredients
-
old apples, amount as desired
-
1 liter of water
-
2 tablespoons of sugar
-
cheesecloth or gauze
-
a glass or ceramic container
How to Make Homemade Apple Cider Vinegar – Step by Step
1. Preparing the Apples
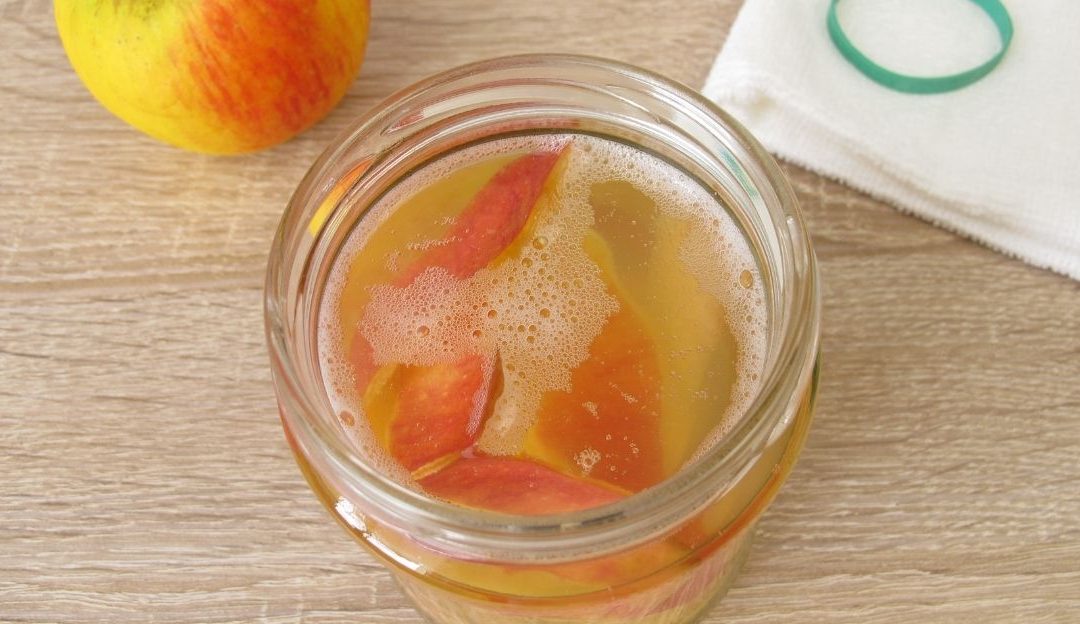
Cut the apples into quarters or eighths. There is no need to peel them. The skin and seeds are an important part of the natural fermentation process.
2. Adding Water and Sugar
Place the chopped apples into the container. Add about 1 liter of water and 2 tablespoons of sugar. Sugar serves as food for the natural bacteria that will, over time, create vinegar.
3. Fermentation
Once the apples are submerged in water, they will begin to soften and break down. This is a normal and desired process. Do not close the container with a lid. Cover it with cheesecloth and secure it with a rubber band. The cloth is important because it allows airflow and protects the mixture from insects.
4. Fermentation Time
The vinegar should sit for a minimum of 10 days, but most often 2–3 weeks. The exact time depends on the ripeness of the apples and the room temperature. You may gently stir the mixture occasionally using a wooden spoon.
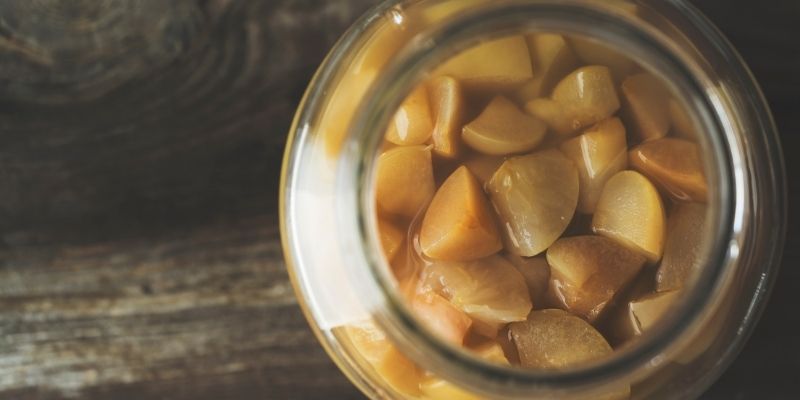
How to Know When the Vinegar Is Ready
Homemade apple cider vinegar is ready when it has a pleasant, sour smell, there is no odor of rot, and the liquid is cloudy (which is completely normal). Once ready, strain the liquid and store it in a glass bottle.
Cleaning a Dog’s Ears: How to Do It Properly and Where People Go Wrong
Dog Training or a Relationship of Love — Why I Don’t Believe in the Circus Approach
The natural fermentation process of apple cider vinegar.
Most Common Mistakes
-
using completely rotten apples
-
sealing the container airtight
-
using metal containers
-
adding too much sugar
Final Note
Homemade apple cider vinegar is not made quickly, but it is made simply. What our grandmothers knew is that nature does not demand perfection, only patience. Apples that are no longer good for eating can become an extremely valuable product. That is the essence of homemade preparation and respect for natural processes.
At Integrative and Holistic Grooming Education, we believe that respecting nature’s slow processes yields the best results for your well-being. Explore our philosophy: Linktree Sasha Riess